Add an email signature to Outlook (step-by-step)
Below are quick, picture-guided steps for each Outlook version. Pick the one that matches your screen.
1) Classic Outlook for Windows (desktop app)
-
Open Outlook → File → Options.
-
Choose Mail → Signatures….
-
In E-mail Signature, click New, name it, and create your signature in Edit signature.
-
Under Choose default signature, set which signature to use for New messages and Replies/forwards.
-
Click Save → OK.
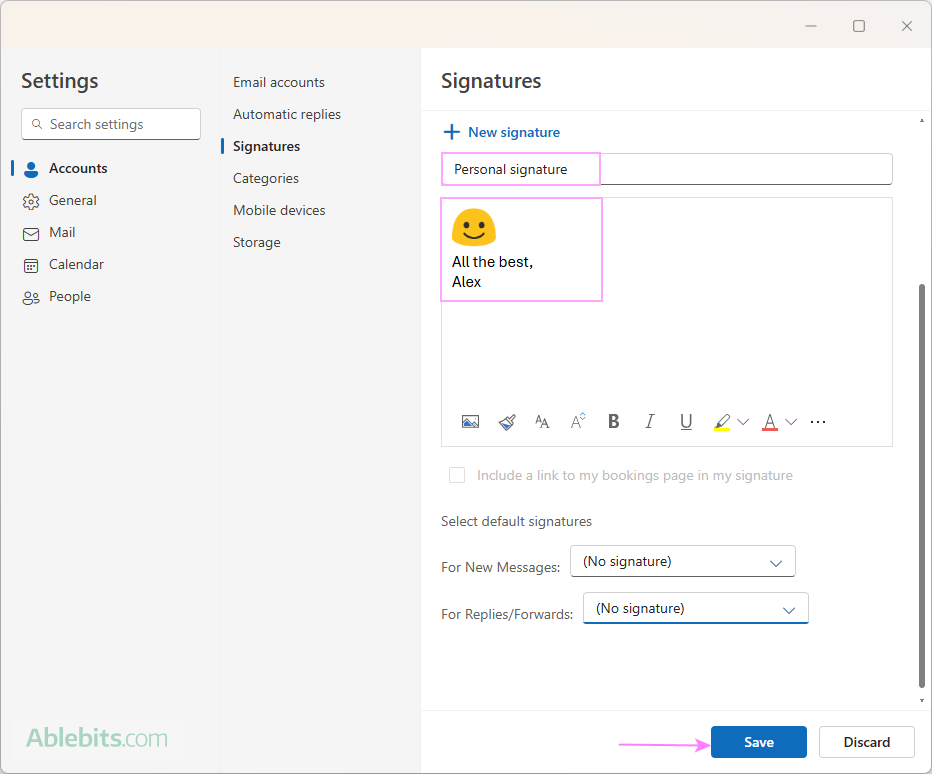
2) New Outlook for Windows & Outlook on the Web (Microsoft 365 / Outlook.com)
-
Click the Settings ⚙️ (top right).
-
Go to:
-
Accounts → Signatures (newer menu), or
-
Mail → Compose and reply (older menu label).
-
-
Click + New signature, give it a name, then design it in the editor.
-
In Select default signatures, choose the signature for New messages and Replies/forwards.
-
Click Save.
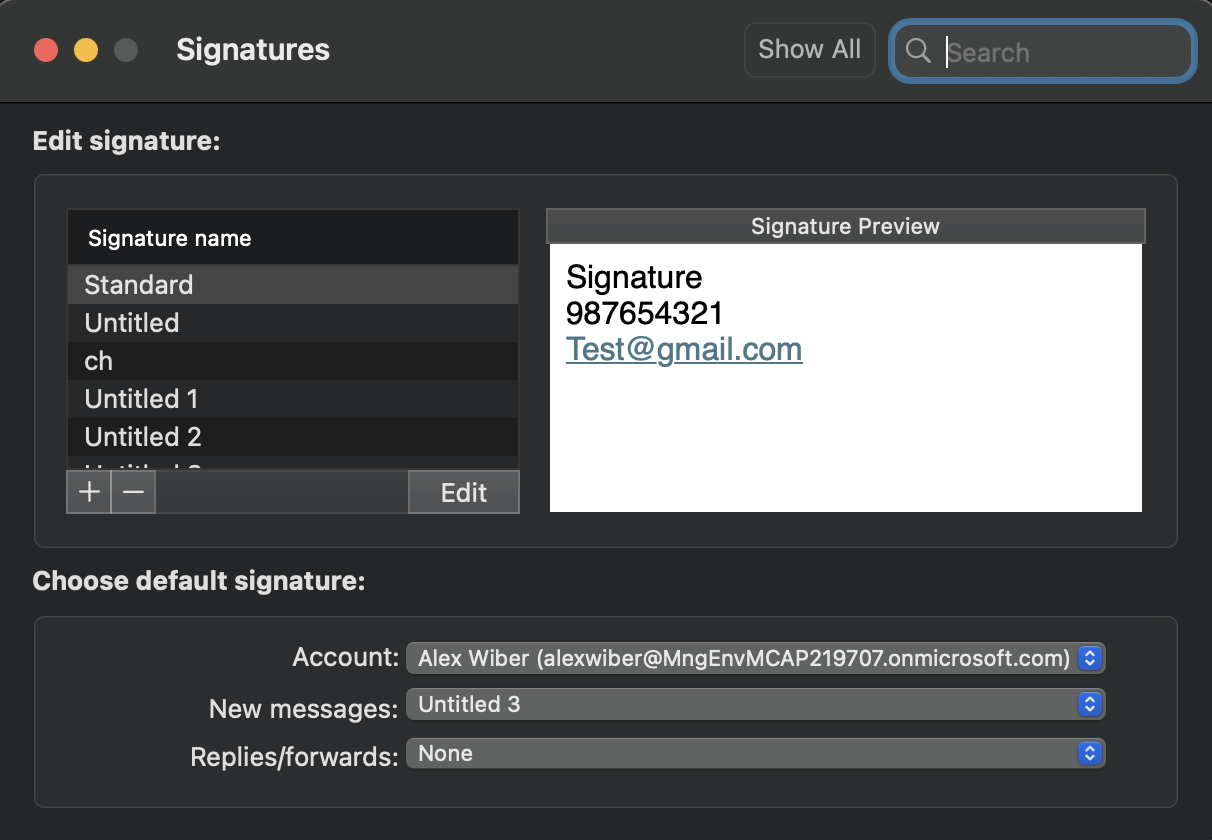
3) Outlook for Mac
-
In the menu bar, click Outlook → Settings.
-
Under Email, choose Signatures.
-
Click + to add a signature, name it, and compose it.
-
Use Choose default signature to set the signature for each account (new messages and replies/forwards).
-
Close the window to save.
Tips (all versions)
-
Insert manually (one-off): When composing, choose Signature on the toolbar/ribbon and pick the one you want.
-
Logos & links: You can paste images and add hyperlinks in the signature editor (works best in the new Outlook & web editor).
-
Multiple accounts: Set defaults per account if you use more than one mailbox.