This guide is designed to provide a walk-through on how to use the Play It Live system (for Beat 103).
Step 1) Accessing The System
You should have received your login details from Beat 103. To access the system, you will need to have Google Chrome installed on your computer. Google Chrome can be downloaded from (https://www.google.com/intl/en_uk/chrome/).
Once installed using Google Chrome, visit https://beat103.playitradio.com:25433/.
Step 2) Logging In
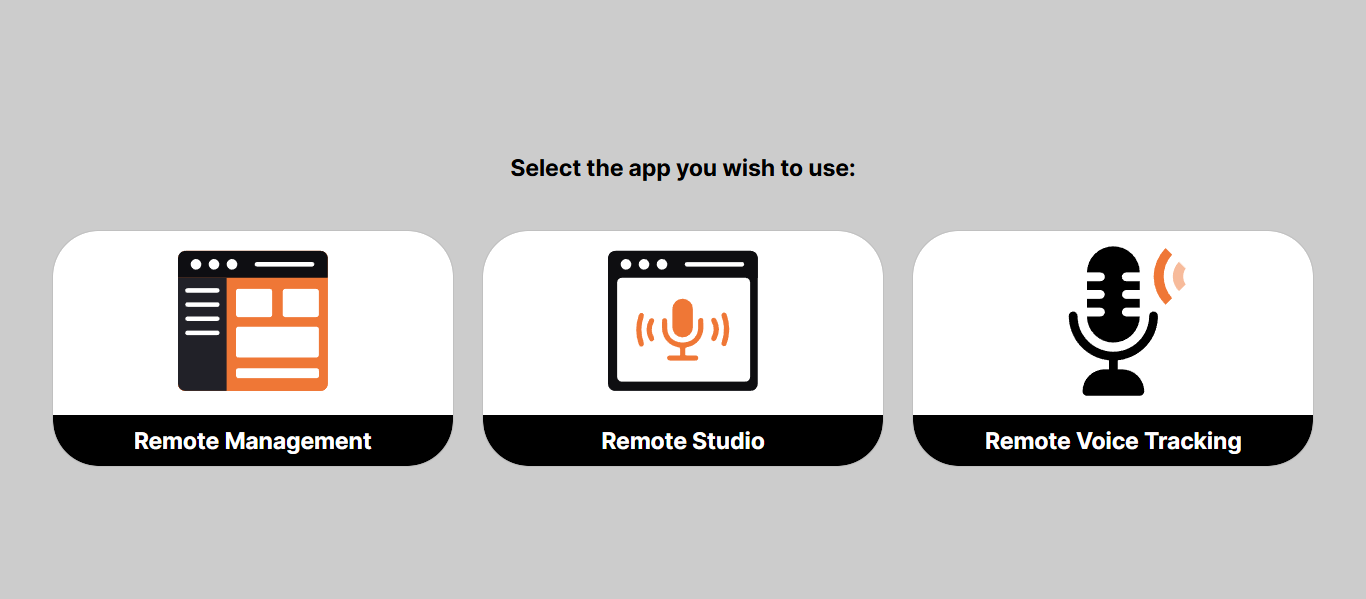
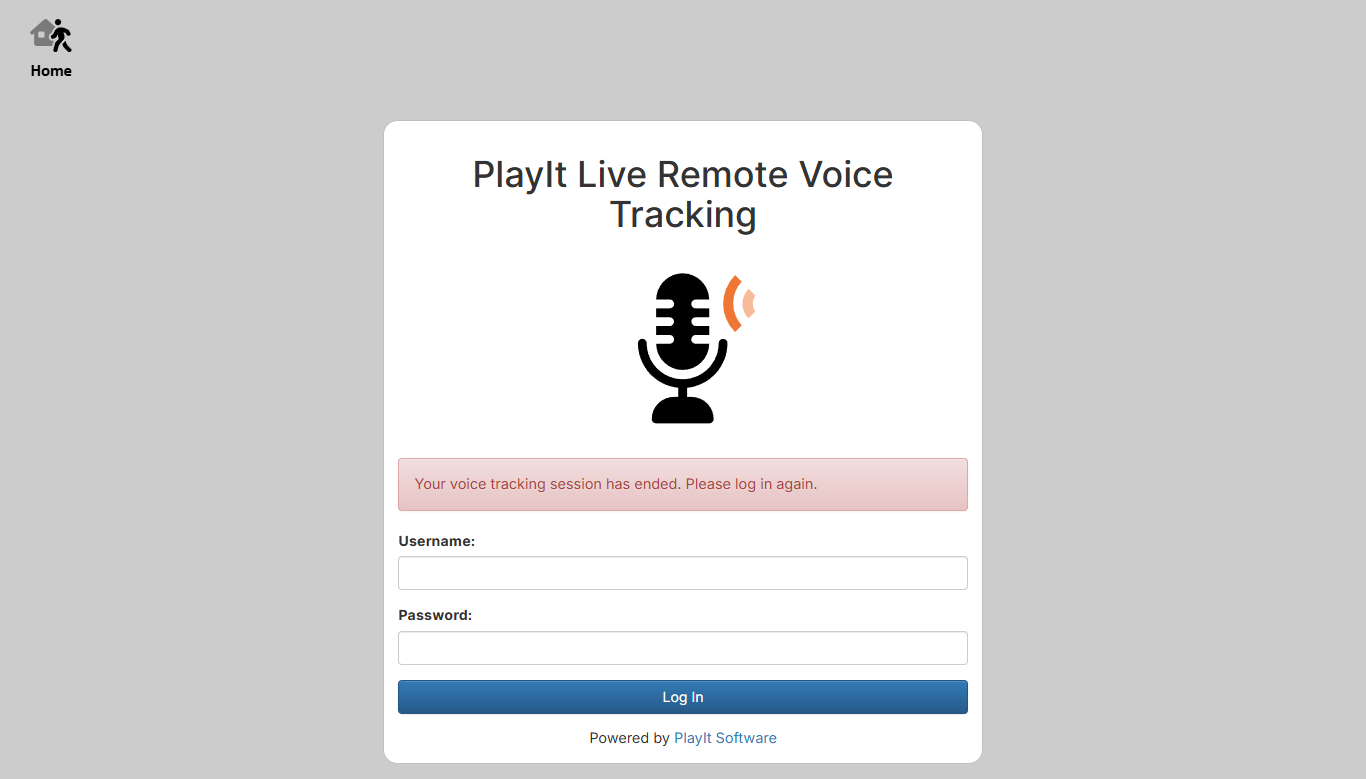
Select Remote Voice Tracking from the three options. This will load a URL similar to https://beat103.playitradio.com:25433/vt. Enter the provided username and password. (If you have not logged in before, you may need to select remote management first; this will allow you to change your password).
Step 3) Selecting Shows
Once logged in, you will see a list of available shows to edit. Select the show you wish to edit. Shows are broken down into hour slots. For example, Wednesday 12th March 15:00 will be the Wednesday 12th March show between 3pm and 4pm.
![]()
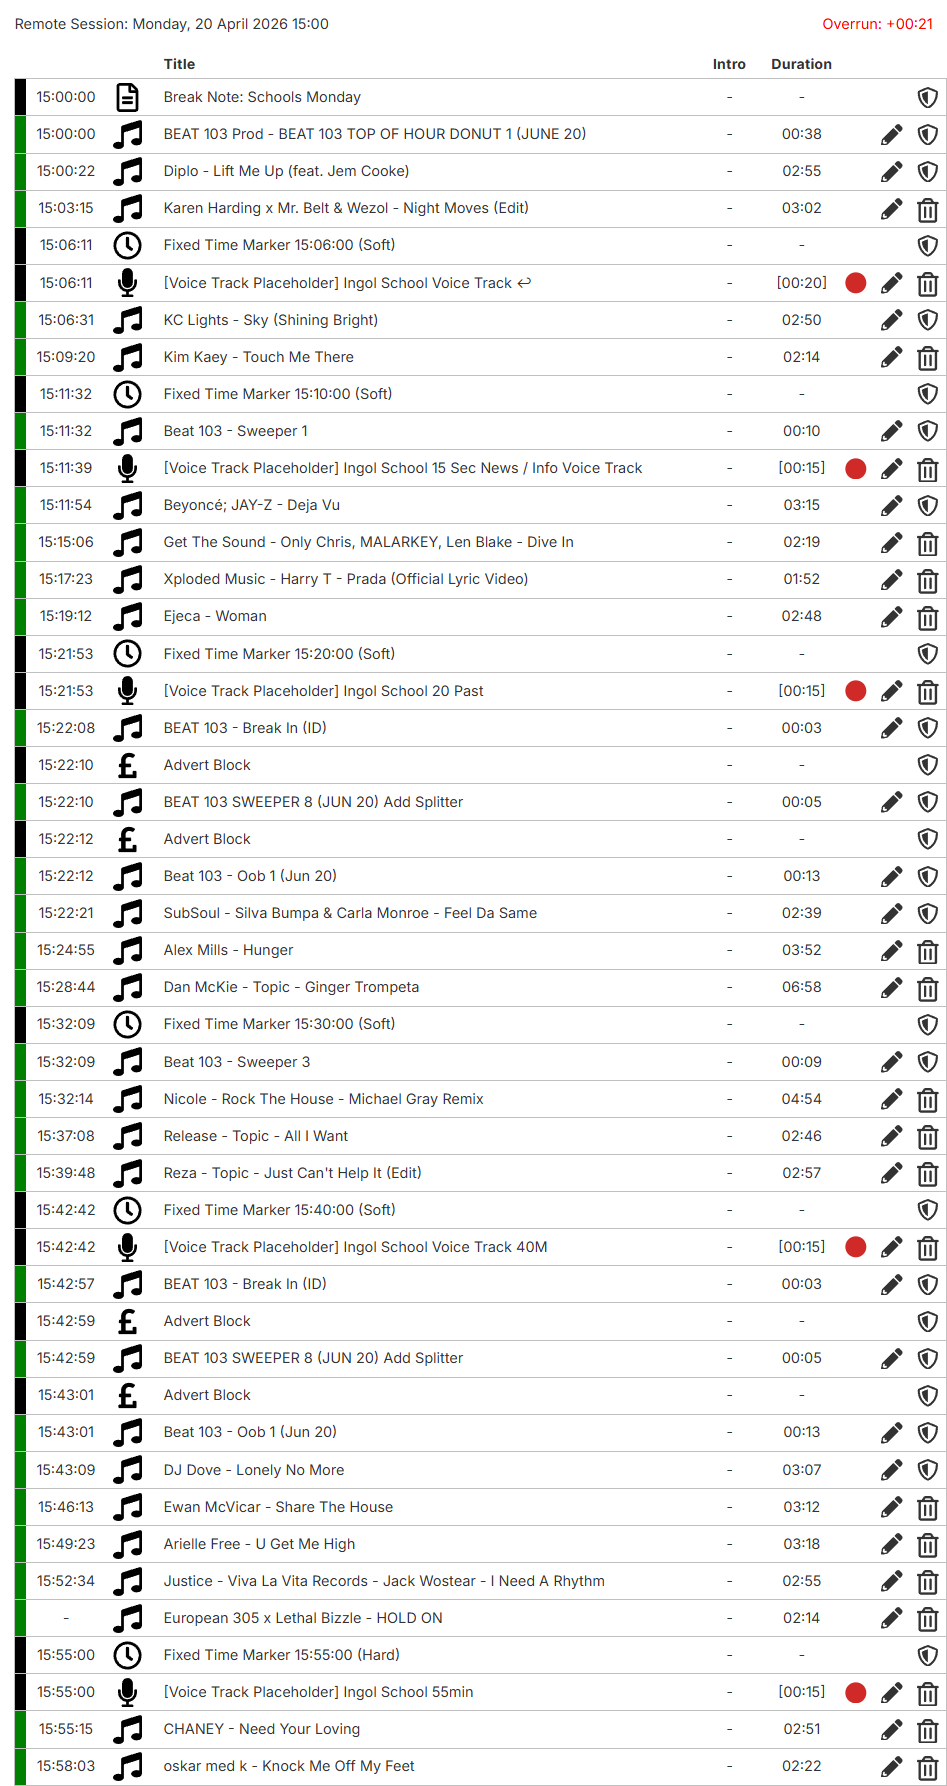
Step 4) Dashboard Preview
Once logged in, you will see the play it live dashboard. The show will automatically import music based on predefined rules as set by the radio station. Google Chrome may pop up with a notice asking for permission to use your system's location and microphone. Select Allow.
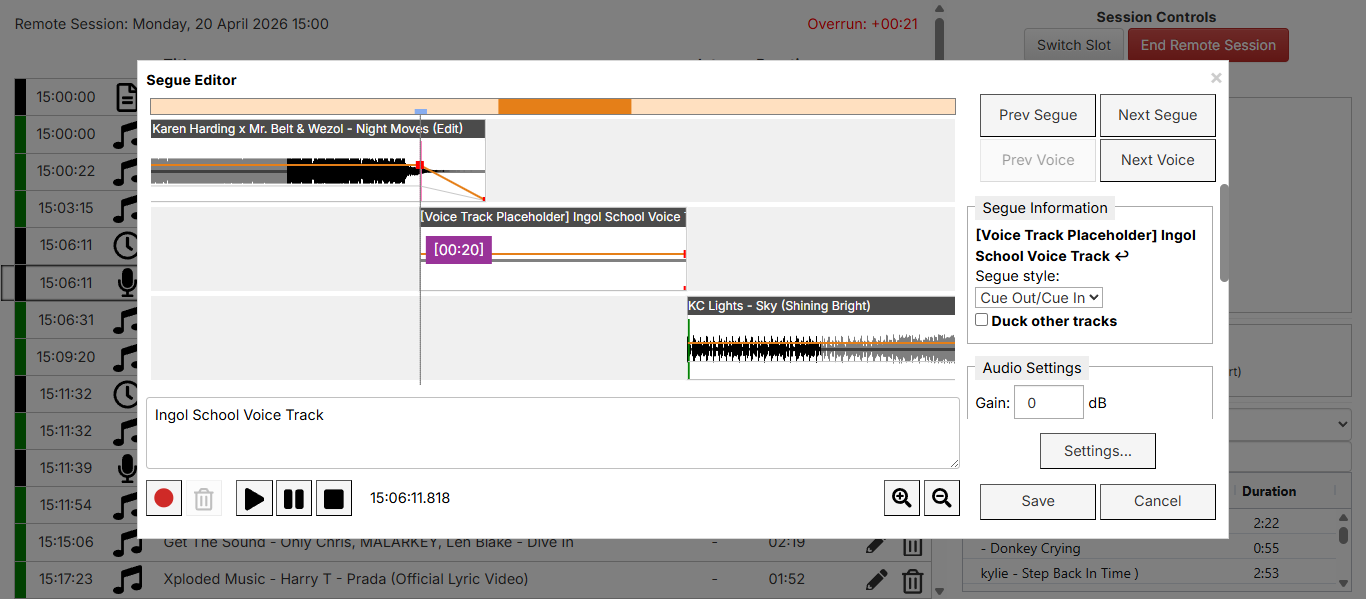
Step 5) Launch Voice Over
To add a voice track, click on the red circle placed next to the edit icon. This will launch the voice tracking page. By default, sequence information should be set to Cue In/ Cue Out. This will allow for seamless integration between the music and voice-over.
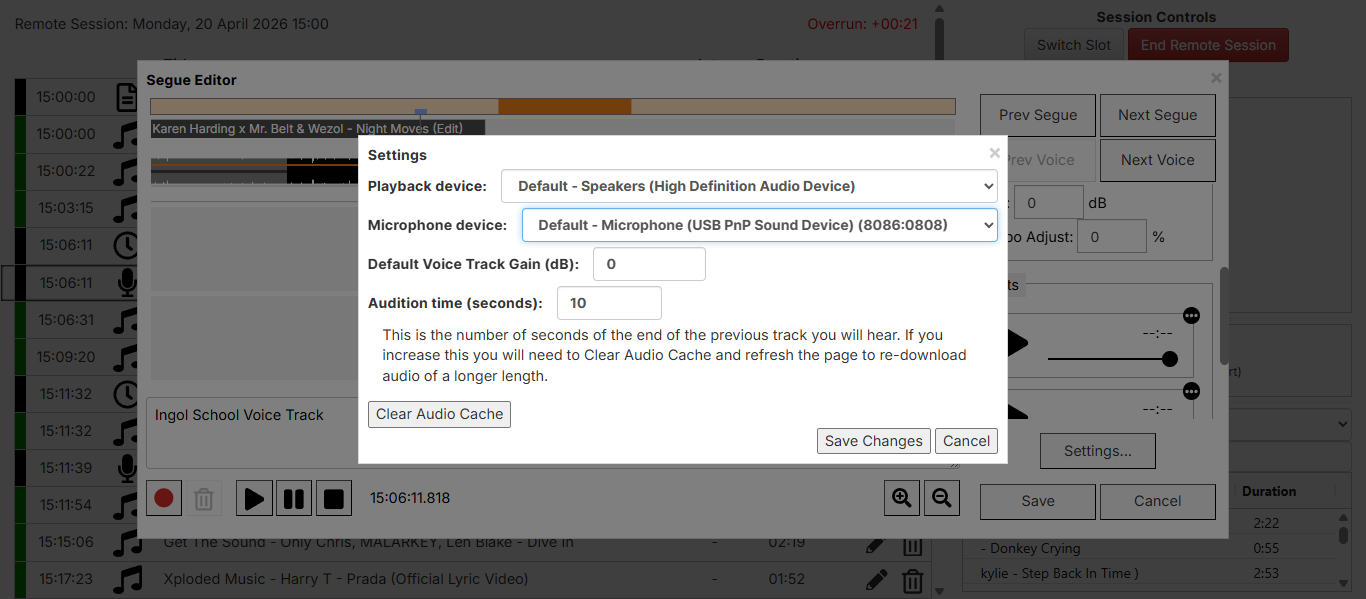
Step 6) Set Audio Capture Device
To set the audio capture device, select settings from the voice-over pop-up. This is located to the right of the pop-up. This will launch the Google Chrome Microphone setup. From the Chrome pop-up select your microphone followed by Allow Whilst Visiting This Site.

Once the microphone is selected and given access, you will be able to select your playback and microphone from the settings tab. Make sure you select speakers to enable playback of recordings. Once done, select Save Changes.
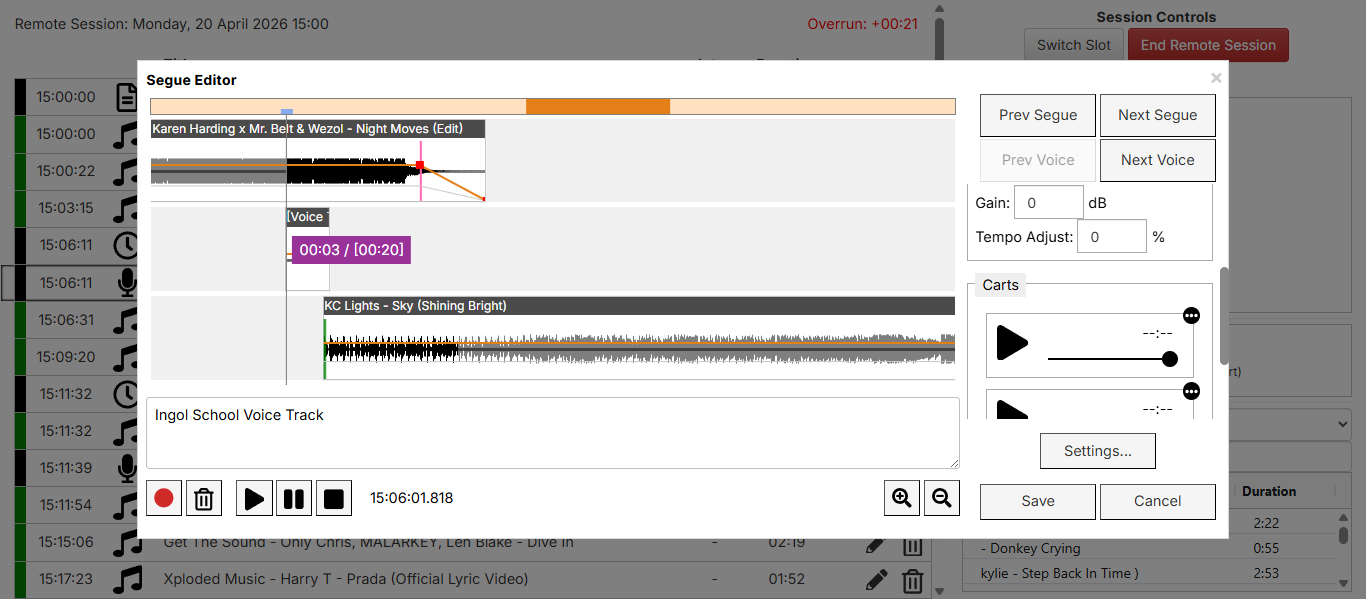
Step 7) Record Voice
To start the voice recording, once again select the red dot, located at the bottom of the pop-up. This will start the recording using the microphone you have selected. You can see the song prior to and after the recording on this page. To pause or stop the recording, select the black arrow (to pause) followed by the square to stop the recording.
You can hear a preview of your recording by clicking play. If you need to redo the recording, select the bin icon followed by the record dot to start again.
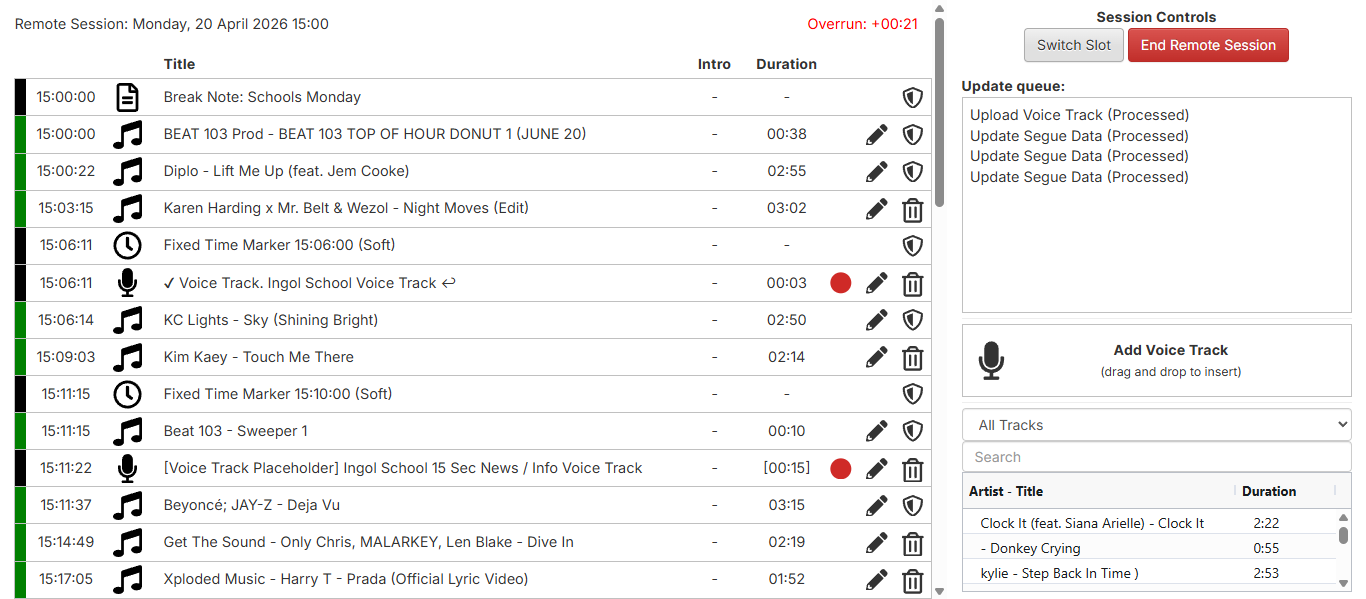
Step 8) Save Recording
Once you have finished recording, select save. Within the right collum you will see the queue status. It is important to ensure all items in the queue are showing as processed. When all items are proceessed you can end the session. This will send the recording to the station ready for broadcasting.